GNSS Configuration
Where: Panel › GNSS Configuration · Serial menu 1 (messages: 2)
How the GNSS module of the MS2net reference station computes the position (how often, with which satellites), where a rover gets its RTK corrections from the Internet (NTRIP client), and which messages the module outputs.
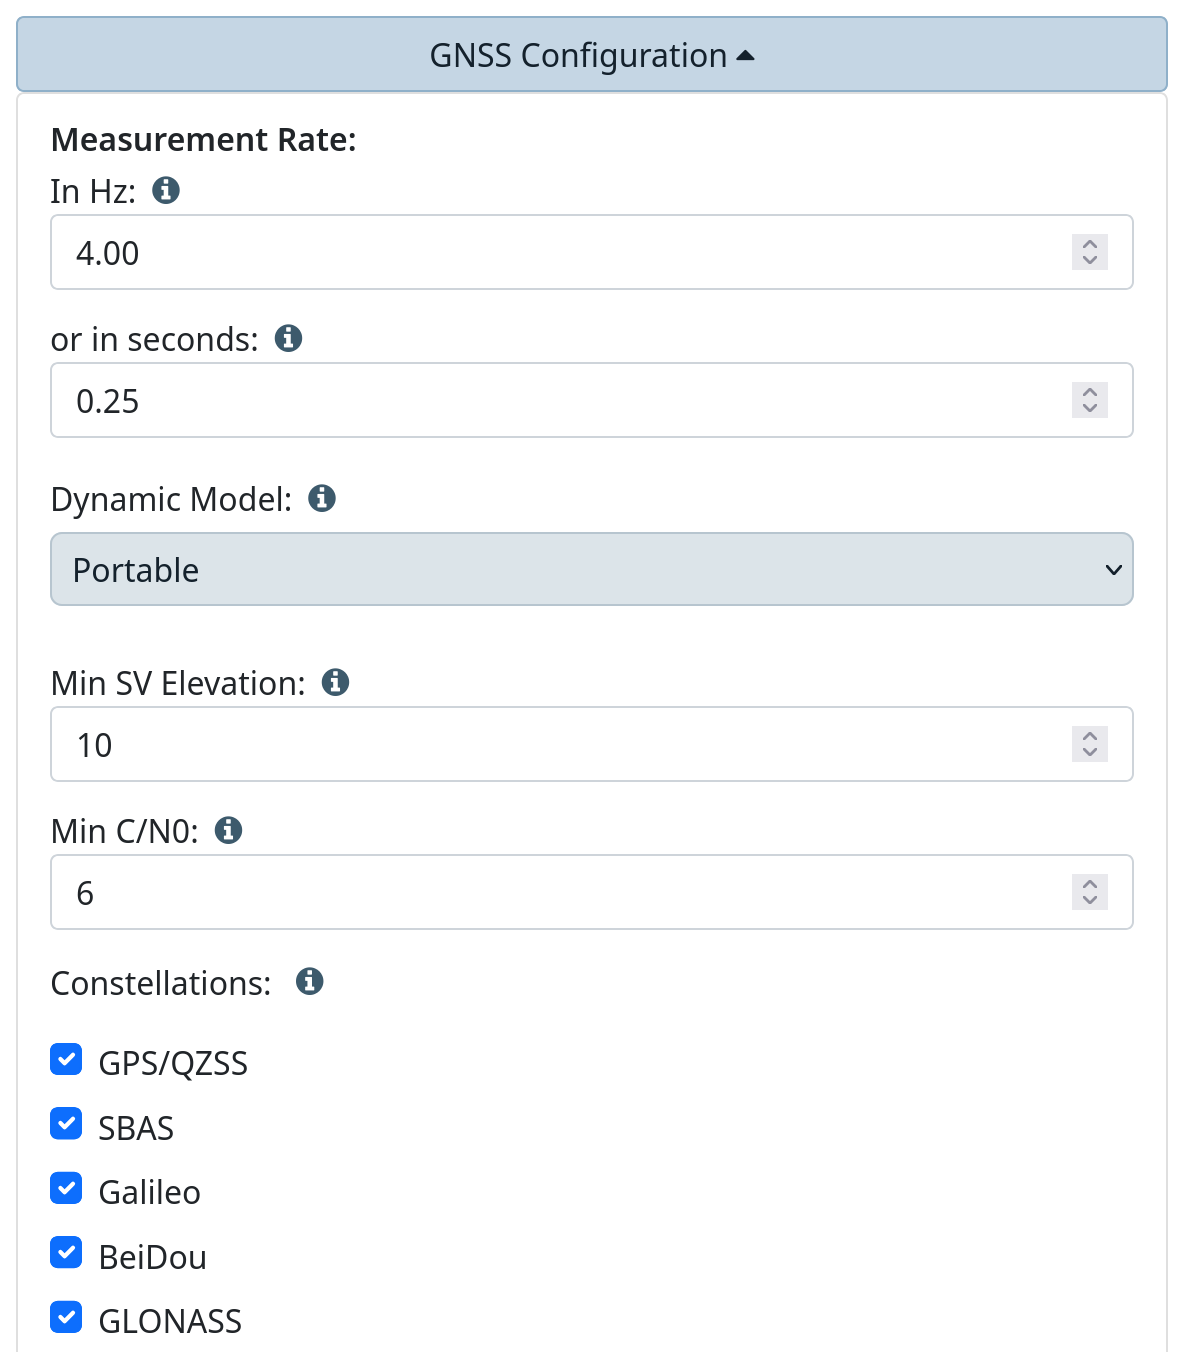
Figure 1 — GNSS Configuration
Position
| Field | What it does | Values | Factory | Serial |
|---|---|---|---|---|
| Measurement Rate | Positions per second (In Hz) or seconds between positions (or in seconds): one setting written two ways. A base always works at 1 Hz, see RTK corrections. | 0.00012 to 10 Hz (serial: up to 20); the seconds box is the same value the other way round (serial: up to 8255 s) | 4 Hz (0.25 s) | 1 → 1 / 2 |
| Dynamic Model | How the antenna is expected to move, so the measurements are filtered to match. | see below | Portable | 1 → 3 |
| Min SV Elevation | Satellites lower than this angle are not used. | 0 to 90° (serial: 1 to 90) | 10 | 1 → 13 |
| Min C/N0 | Weakest signal, in dBHz, a satellite must have to be used. | 0 to 90 dBHz (serial: 1 to 90) | 6 | 1 → 14 |
With the NTRIP client off, the last two serial items become 6 and 7.
- Measurement Rate: 4 Hz suits almost all field work. Raise it only for fast vehicles (more data on the card and the links); lower it for long static logging, to keep files small.
- Min SV Elevation: raise it (15°) where the horizon is cluttered and multipath is a problem; lower it only under a truly open sky.
- Min C/N0: 20–30 dBHz discards weak, reflected signals near trees or walls, at the cost of fewer satellites. The factory value is the module's own default.
| Dynamic Model | When |
|---|---|
 Portable Portable |
General use, pole carried by hand. |
 Stationary Stationary |
Antenna that does not move: base, monitoring point. |
 Pedestrian · Pedestrian ·  Automotive · Automotive ·  Sea · Sea ·  Bike · Bike ·  Wrist Wrist |
Walking, road vehicles, boats, bicycles, worn on the wrist. |
   Airborne 1g / 2g / 4g Airborne 1g / 2g / 4g |
Aircraft and drones; the number is the largest acceleration expected. |
| Mower · E-Scooter | Offered only when the GNSS module supports them. |
Constellations
The satellite systems used for the position: GPS/QZSS, SBAS (augmentation, EGNOS
in Europe), Galileo, BeiDou, GLONASS. Factory: all enabled. Serial: 1 →
4, then one number per system; GPS and QZSS switch together.
At least one of GPS, Galileo, BeiDou and GLONASS must stay on, or the page answers
Please choose one constellation. More satellites give a faster, more robust RTK fix:
turn one off only when a job requires it or the corrections in use do not include it.
NTRIP client

Figure 2 — Animation: turning NTRIP client on
Enable NTRIP Client brings up the caster fields (example values).
Enable NTRIP Client makes the rover download corrections from a caster on the
Internet, through a WiFi network saved in WiFi; it must stay in range of that
network. The header then shows Startup Mode: Rover · NTRIP Client. The details come
from the correction service, or from your own base (see
Base › NTRIP server). Unticking the box keeps the fields for next
time.
On a rover with Radio on ESP-Now the NTRIP client is not available: see ESP-Now radio › Radio channel and WiFi.
| Field | What it does | Values | Factory | Serial |
|---|---|---|---|---|
| Enable NTRIP Client | Receive corrections from a caster. | on, off | off | 1 → 5 |
| Caster Host | Caster name or IP, without http://. |
1 to 45 characters | empty | 1 → 6 |
| Caster Port | TCP port of the caster. | 1 to 65535 | 2101 | 1 → 7 |
| Caster User | User name on the caster. | text | empty | 1 → 8 |
| Caster User PW | Password of that user. | text | empty | 1 → 9 |
| Mount Point | Correction stream to receive. | 1 to 30 characters | empty | 1 → 10 |
| List | Asks the caster for its mount points: see Mount point list. | button | 1 → 15 |
|
| Mount Point PW | Only for the few casters that protect the stream rather than the user. | text | empty | 1 → 11 |
| Transmit GGA to Caster | The rover sends its position to the caster. Network services (VRS, nearest mount points) need it or send nothing; harmless with a single base. | on, off | on | 1 → 12 |
From the serial menu, a change to item 5 or any later item restarts the rover work when
the main menu is closed, and puts the station in rover mode even if it was a base.
Mount point list
The List button beside Mount Point asks the caster which mount points it offers, so the name does not have to be typed. It needs Caster Host and Caster Port filled in and a network in WiFi with Internet access; Caster User and Caster User PW are sent too, for casters that show their list only to their users. The page uses the fields as they are, even before Save. The caster used for the list is not stored: the client settings change only with Save.
- Press List. The page shows
Asking the caster for its mount points: the station joins the WiFi network and downloads the caster's table, in a few seconds (up to about 40 when the network or the caster is slow). - The list appears below the field, one row per mount point: name, then format and place when the caster gives them. The row of the current Mount Point is highlighted.
- Click a name: it goes into Mount Point and the page shows
Mount Point set to …: press Save to keep it. - Press Save.
At most 40 mount points are shown; if the caster has more, the message says
The first 40 mount points of the caster: pick one, and a mount point further down the
table is typed by hand.
| Message | When | What to do |
|---|---|---|
7 mount points: pick one |
list The list arrived (the number is the caster's). | Click a name, then Save. |
The first 40 mount points of the caster: pick one |
first 40 The caster has more than 40. | Pick from the list, or type the name. |
Fill in Caster Host and Caster Port first |
empty field One of the two fields is empty or out of range. | Fill them in and press List again. |
The station needs a WiFi network with Internet access: add one in WiFi Configuration |
no network The WiFi list is empty. | Add a network; it is used even before Save. |
The station is not connected to a WiFi network with Internet access: check WiFi Configuration |
no WiFi No network in the list is in range, or its password is wrong. | Check name and password of the network in WiFi. |
Caster not reachable: check Caster Host and Caster Port |
unreachable Wrong address or port, or the network does not reach the Internet. | Check the two fields and the network. |
The caster refused Caster User or Caster User PW |
refused The caster shows its list only to its users. | Check Caster User and Caster User PW. |
The caster answered with error … |
error The caster turned the request down for another reason; the number is its error code. | Check the address: it may not be a caster. |
The caster lists no mount points |
empty The caster answered with an empty table. | Ask the correction service for the mount point name. |
The caster did not answer in time |
time out Slow network or caster. | Press List again. |
Not enough memory on the station: restart it and try again |
memory The station could not set aside room for the list. | Restart the station and try again. |
No answer from the station |
station The page lost contact with the station. | Reload the page. |
From the serial menu, item 15 (shown only with the NTRIP client on) prints the same
list for the caster saved in items 6 to 9, with the same limit of 40; the chosen
name is then entered with item 10.
Message Rates
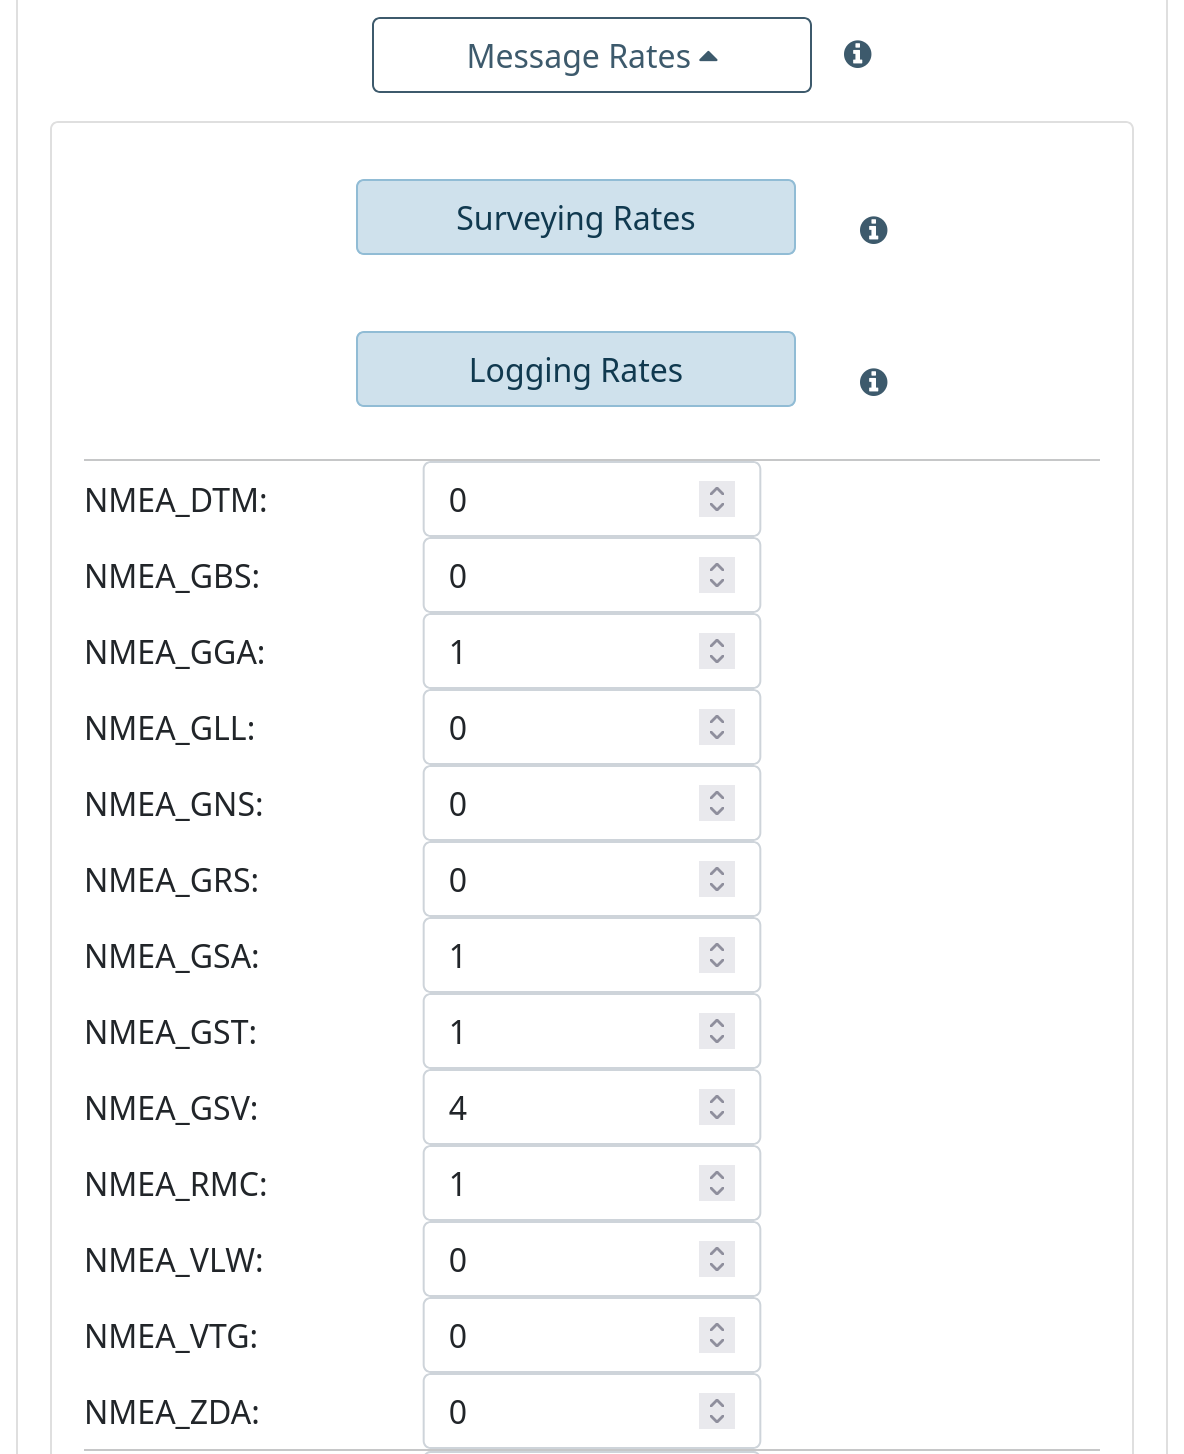
Figure 3 — Message Rates
The messages the module outputs, written to the microSD card and sent to connected
devices, grouped by family (NMEA, RTCM, NAV, NAV2, RXM, MON, TIM, PUBX…). Each box is
0 to 255: 0 off, 1 with every position, N once every N positions (at 4 Hz, a
GSV at 4 comes once a second). Factory: NMEA GGA, GSA, GST, GSV, RMC. Serial: 2 →
1…9 opens one family; numbers missing from a list are messages the module does not
support. RTCM here is what a rover outputs; a base uses
Base › RTCM Rates.
| Button | What it does | Serial |
|---|---|---|
| Surveying Rates | Everything off, then GGA, GSA, GST, RMC at 1 and GSV at 4. | 2 → 10 |
| Logging Rates | The same plus raw measurements RXM-RAWX and RXM-SFRBX at 1, for post-processing. | 2 → 11 |
| Turn off all messages | Serial menu only. Every rate to 0. | 2 → 12 |
| Turn on all messages | Serial menu only. Every message on: far more data than the card and links can carry, for tests only. | 2 → 13 |
In the panel the buttons only fill the boxes until Save; in the serial menu items
10 to 13 act at once, without asking, and the rates reach the module when the menu is
left with x. There, items 10 and 11 set GSV to once a second (4 at the factory
4 Hz; every position below 1 Hz), where the panel buttons always write 4.
More messages, more data
Every message adds to the stream. At high rates a long list can saturate the link to the module and the microSD card: enable only what is used.